Capture a payment
This part of the guide explains how to capture a payment.
The registration of a payment happens during the following operations: (1) the payer identification, (2) the payment, (3) the amount due and (4) the summary. The navigation train indicates the step of the payment registration and the Next or Previous buttons allow you to continue or go back in the payment registration. SIGTAS offers the opportunity to enter a payment using the TIN or a payment document, as applicable. The payment can only be changed only during the entry process. Once the payment is registered, no changes are allowed. If modifications are required, the payment must be reversed and then saved again.
The following example shows how to capture a payment using the taxpayer's TIN. This procedure is standardized and applies also to the registration of a payment using a payment document.
Step 1 - Go to the page Payer Identification
- Go to the Cashing module;
- Choose the Capture Payment menu. This action opens the Payer Identification page (507:2001);

Step 2 - Capture a payment
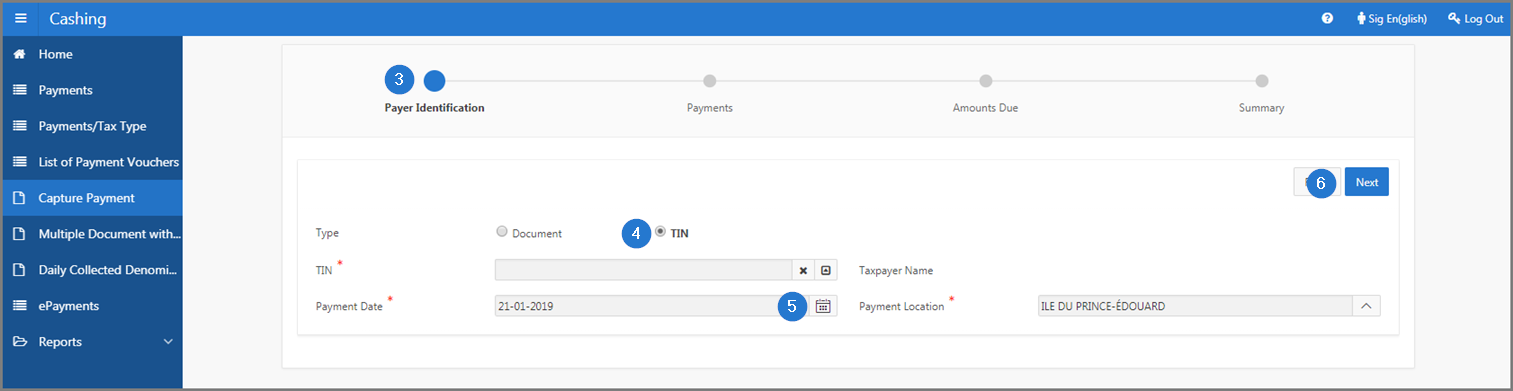
- The Payer Identification box appears in blue (this is the first step of the payment);
- By using the radio buttons, choose the Document or the TIN option, as appropriate;
- Fill out the required fields (identified by a red asterisk *). For example, TIN, Payment Date, etc.;
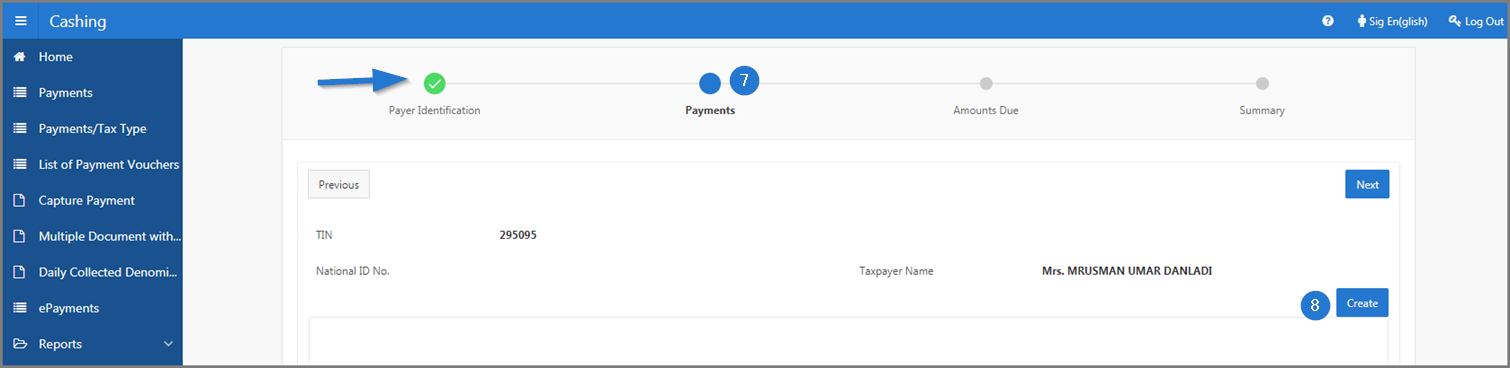
- Click the Next button. This action refreshes the Payer Identification page (507:2001) and redirects you to the second step of the payment. The Payer Identification box appears in green.
- The Payments box appears in blue (this is the second step of the payment);
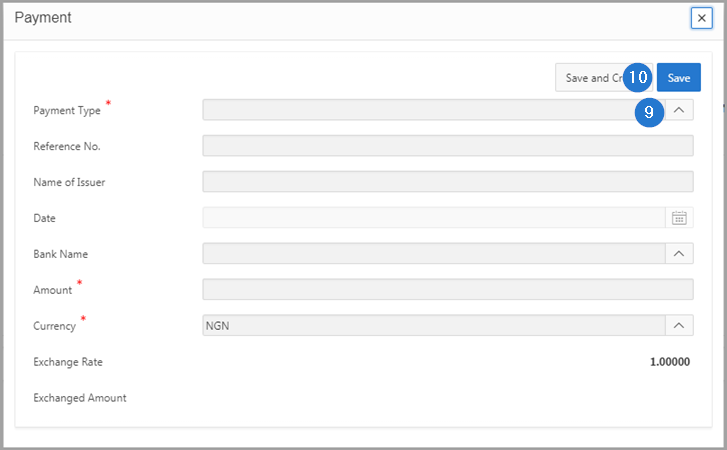
- Click the Create button. This action opens the pop-up window Payment;
- Fill out the required fields (identified by a red asterisk *). For example, Payment Type, Amount, etc.;
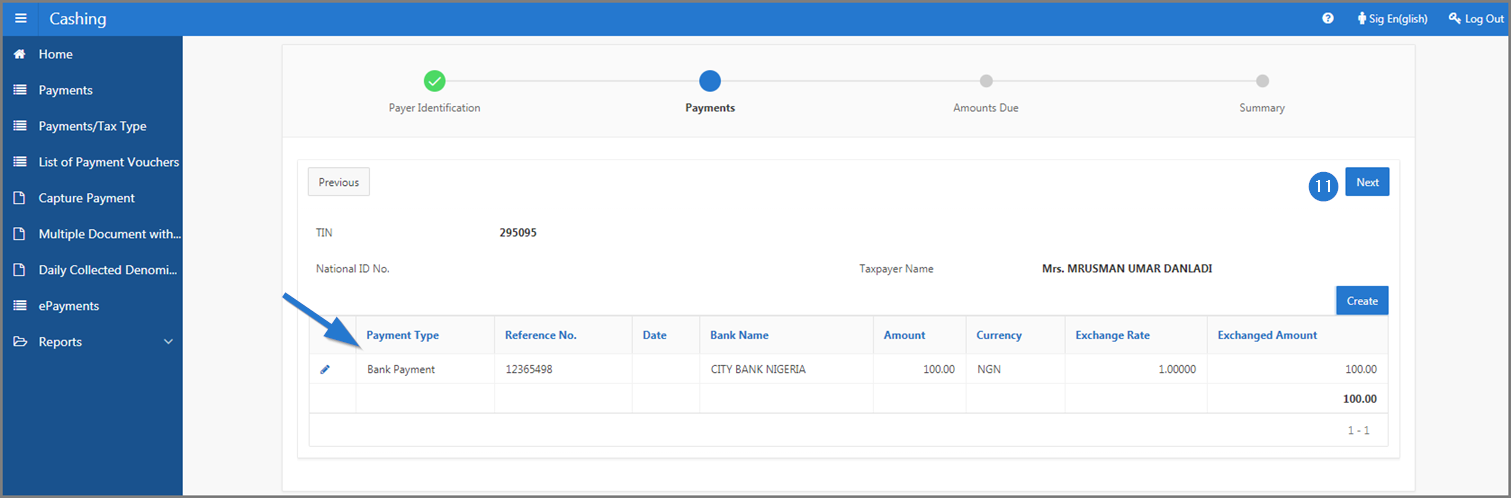
- Click the Save button. This action redirects you to the Payer Identification page (507:2001) and displays details of the payment in the lower section;
- Click the Next button. This action redirects you to the third step of the payment. The Payments box appears in green;
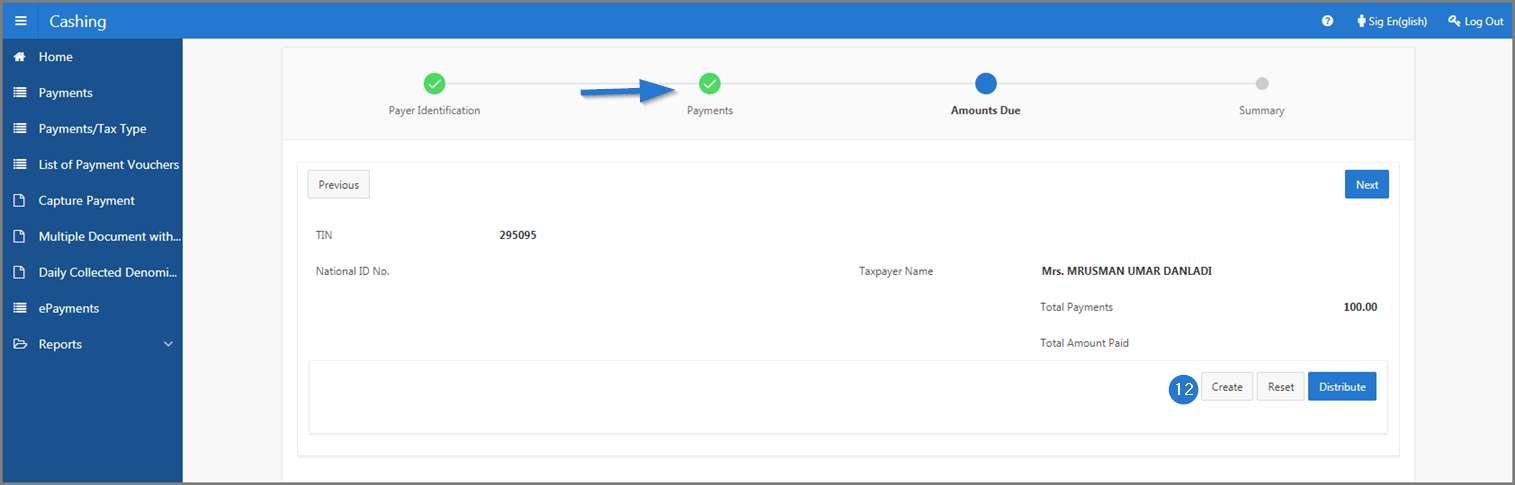
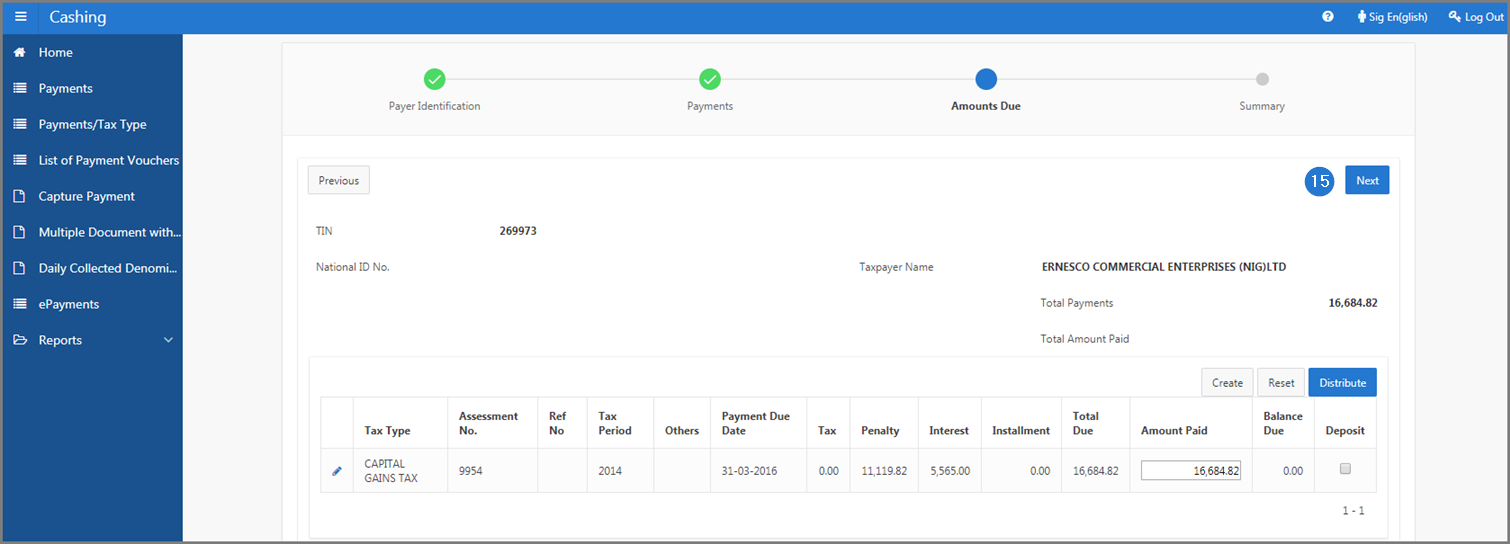
- If you checked TIN in item 4, click the Create button. This action opens the pop-up window List of Unpaid Tax Periods. If not, go directly to item 15;
- Check the box of the Tax Type you want to refer to;
- Click the Select button. This action redirects you to the Payer Identification page (507:2001) and displays the details of the amount in the lower section;

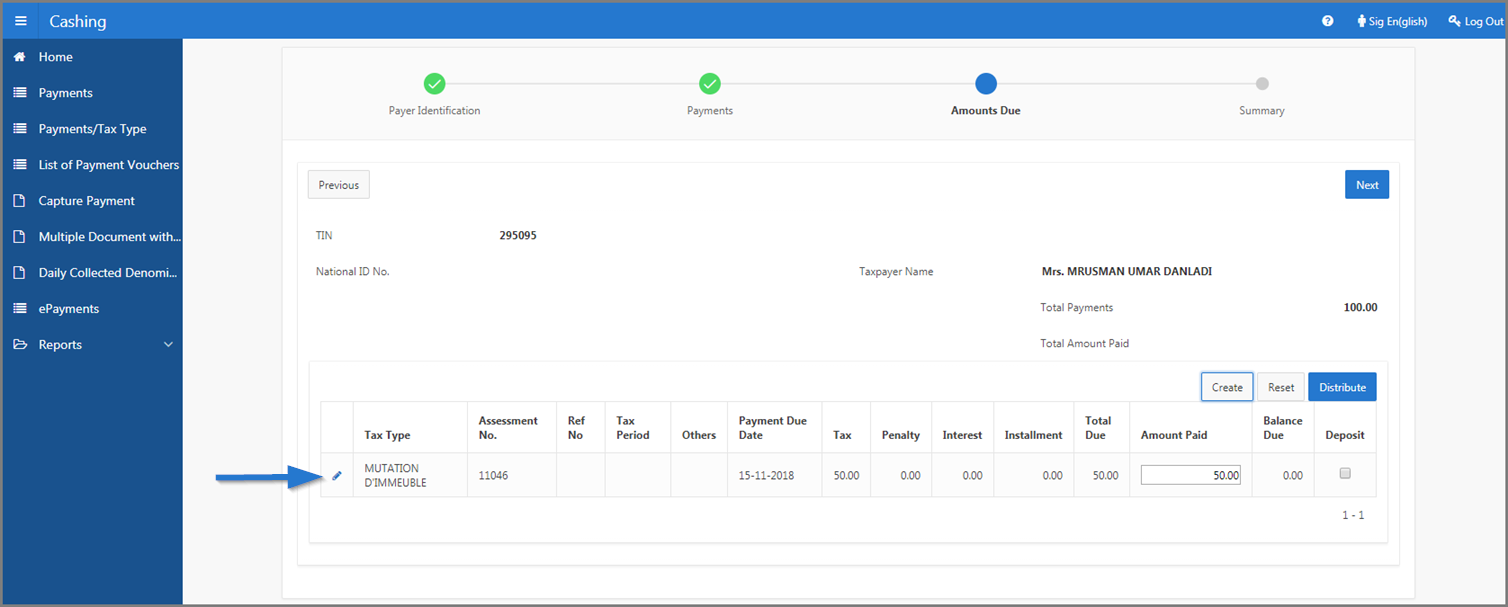
Before you finalize your payment, you can either, click the Distribute button (SIGTAS automatically distributes the amount owing), or click the Reset button and enter the new amount in the Amount Paid field.
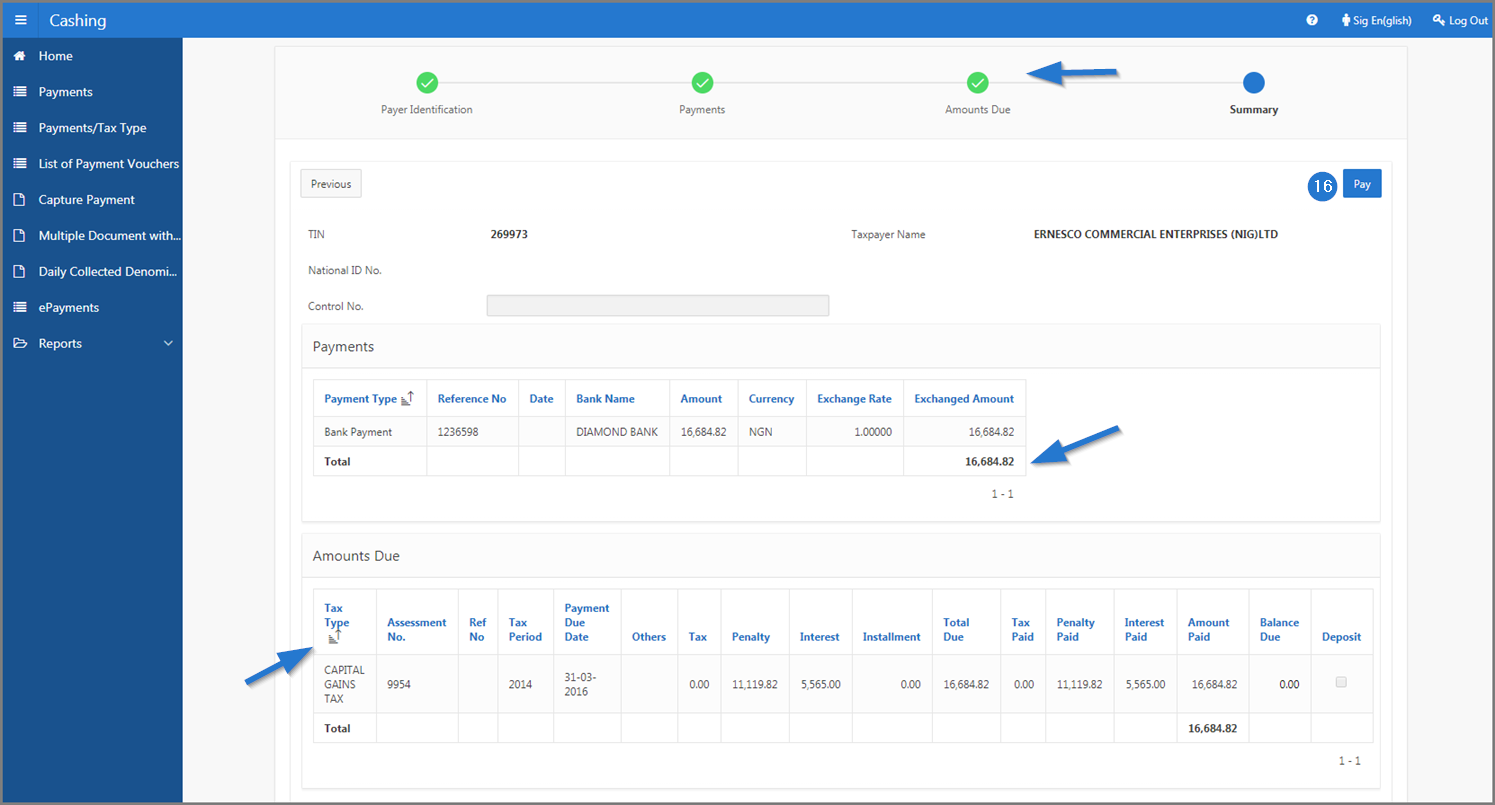
- Click the Next button. This action redirects you to the fourth operation of the payment and displays the summary of the payment in the lower section. The box Amounts Due is displayed in green;
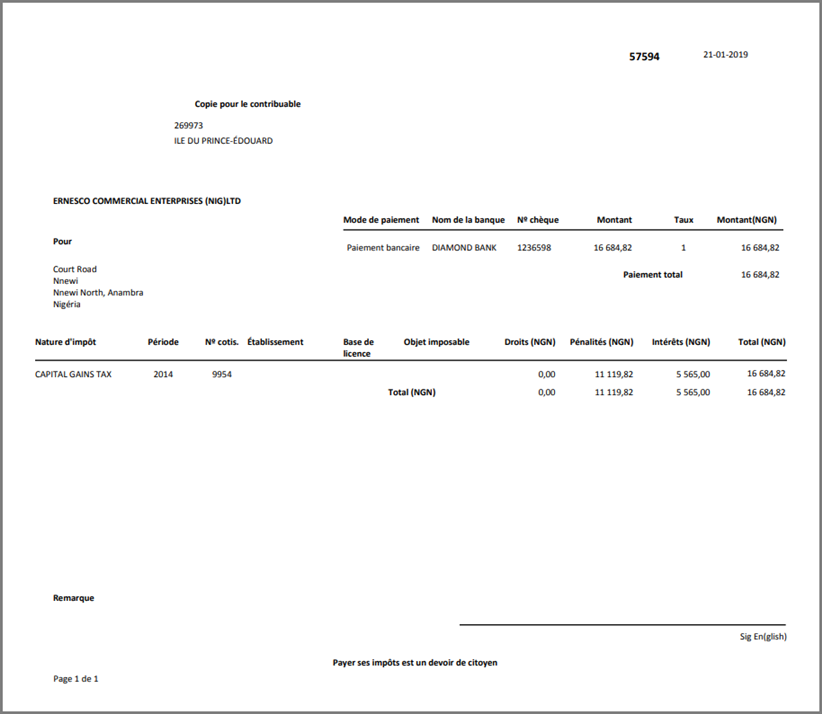
- Click the Pay button. This action confirms the payment, displays the payment receipt in PDF format and resets the Payment Identification page (507:2001).