SIGTAS allows the user to load CSV files (spreadsheet-based computer files with values separated by commas). This function is used for compiling and transferring data such as TIN or account numbers, etc. For example, a CSV file may contain opening balance(s), data or values used for assessments.
Loading CSV files in SIGTAS requires the data to be separated by a comma and to respect the encoded UTF-8-dom format. This format is important because it ensures compatibility between data from SIGTAS and the CSV file. Failure to comply with this format will result in hardware incompatibility and failure to download the requested data. In this case, SIGTAS will inform the user of the incompatibility. Once the data is loaded, SIGTAS validates the content, assigns an upload number and displays the result on the related page and module.
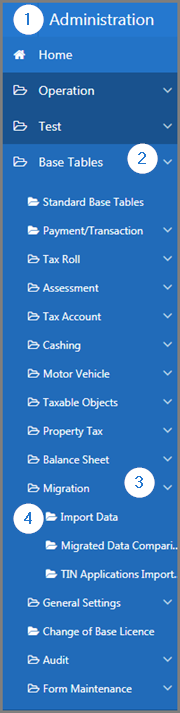
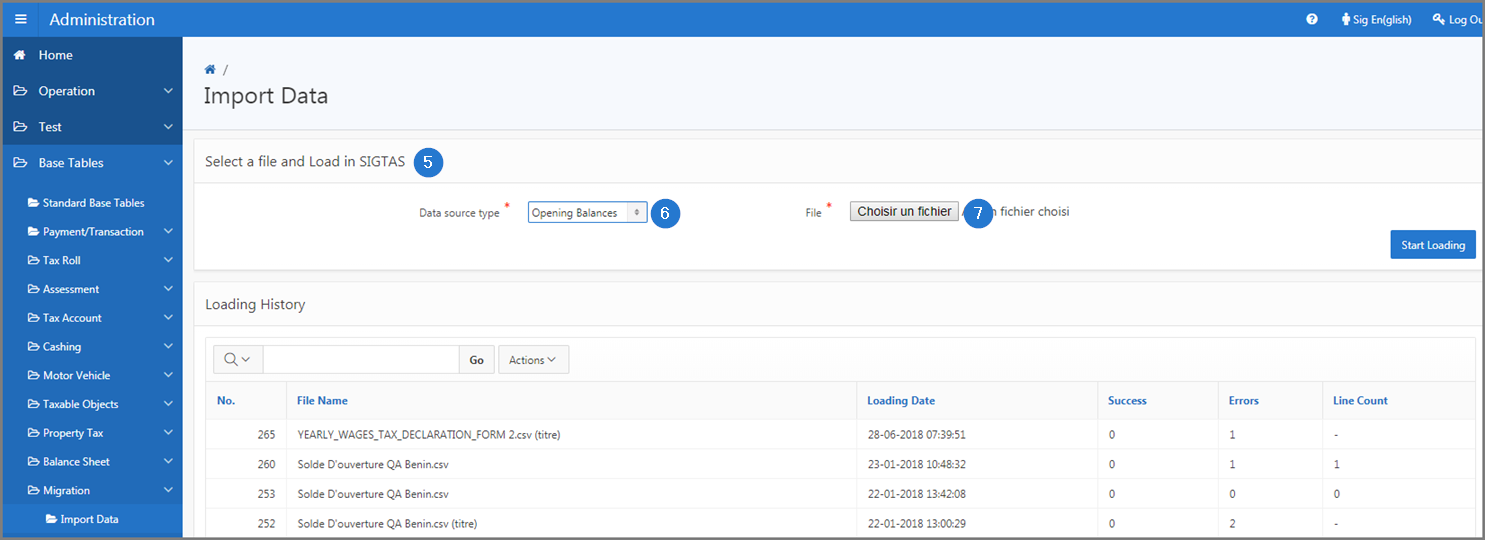
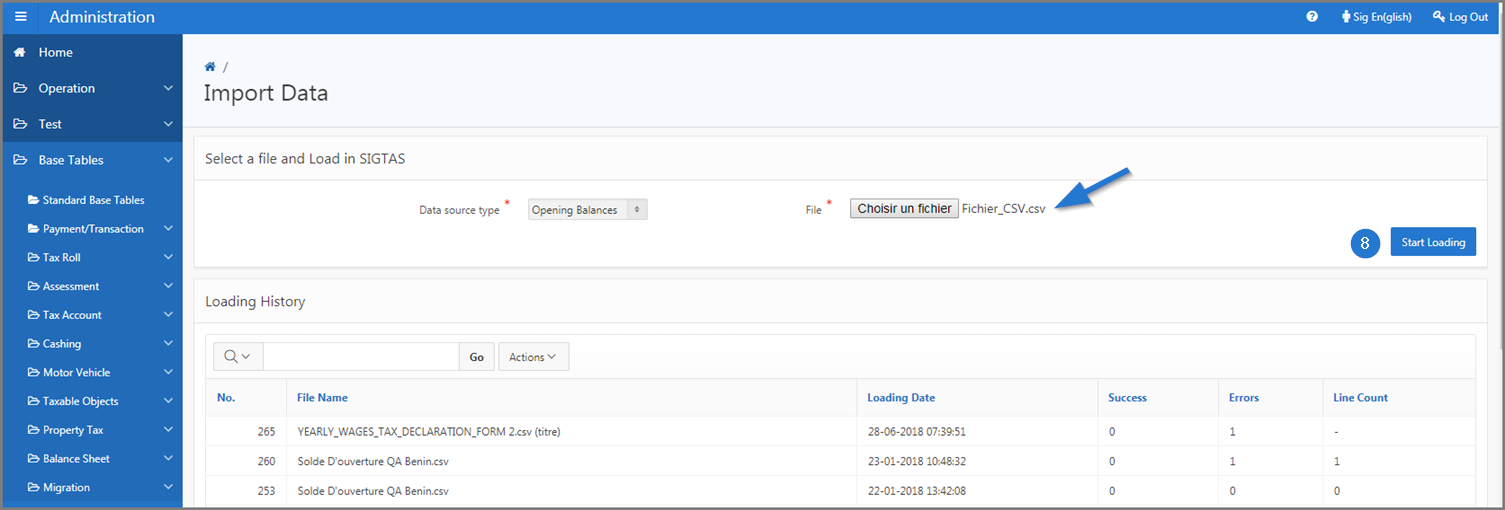
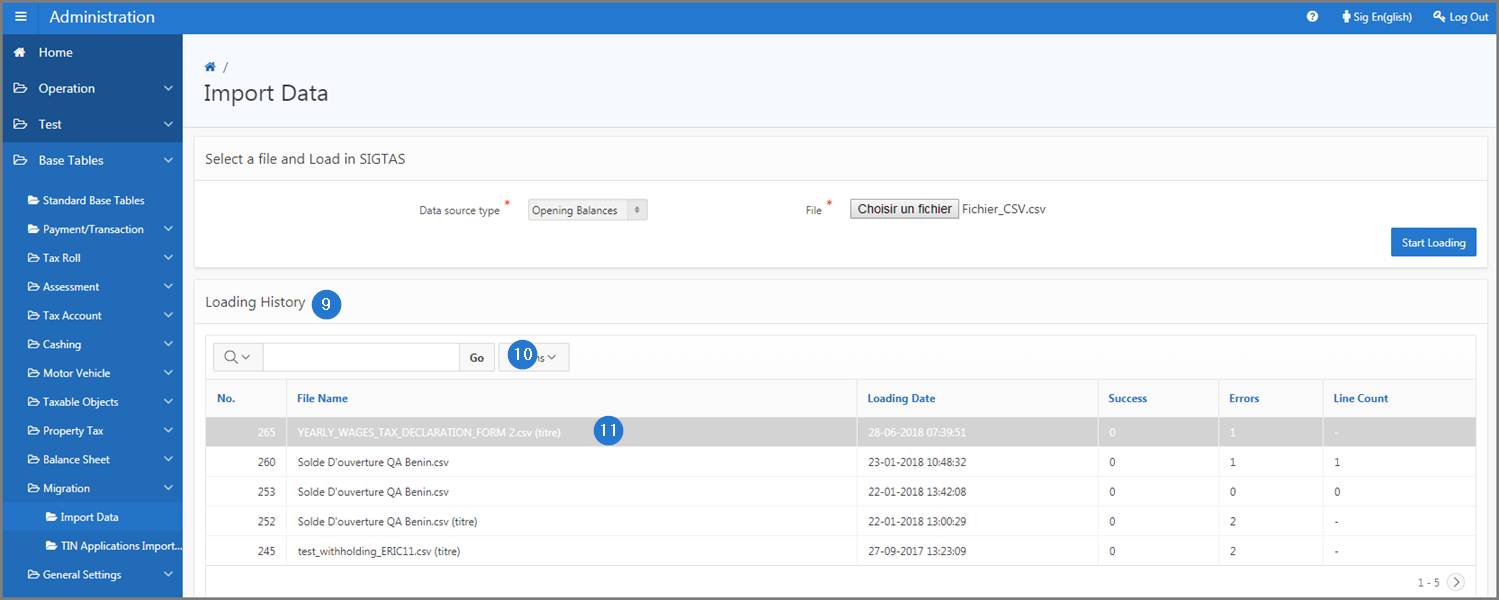
The following example explains how to load a CSV file into SIGTAS via the Import Data page (509:89000) in the Administration module. This procedure is standardized and also applies to all uploads of CSV files in SIGTAS.
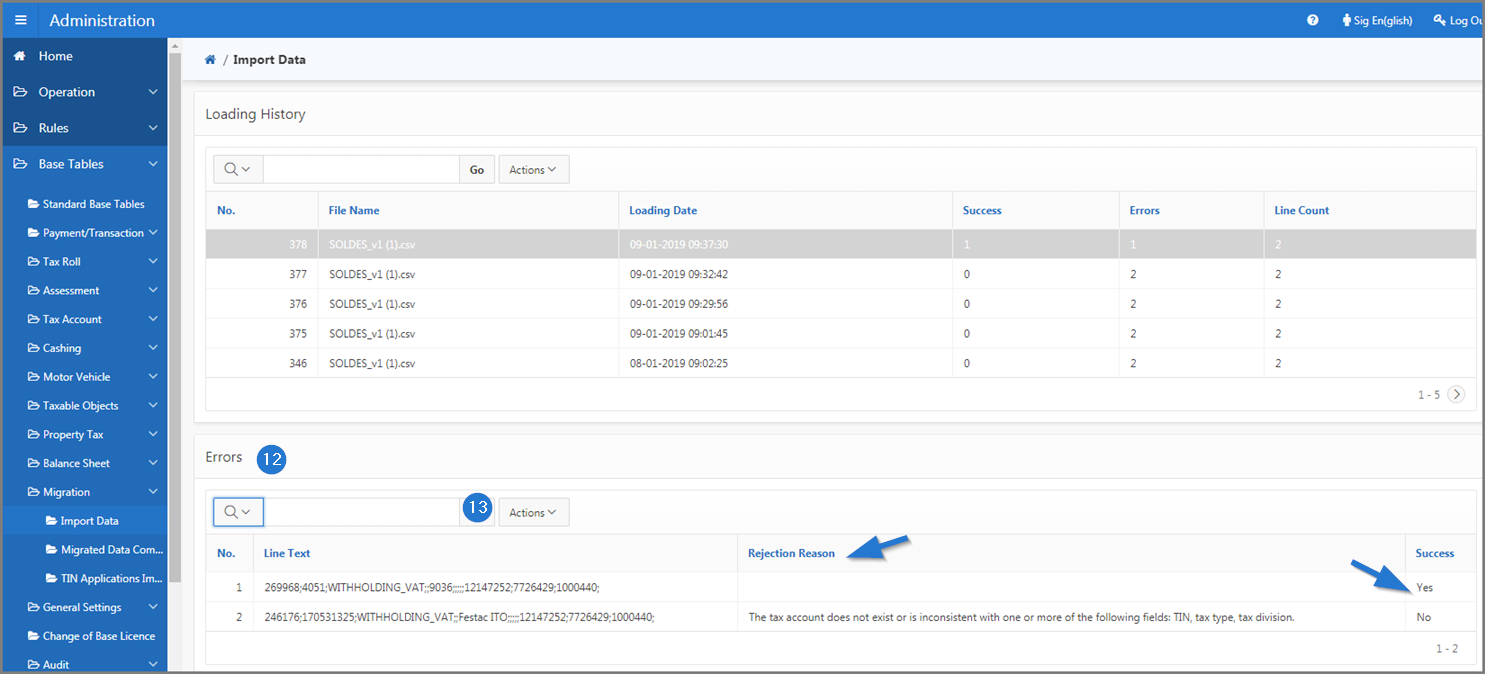
Providing a successful upload, a Y (Y = yes) will be displayed in the Success column. A failed upload will result in a N (N = no) in said column and the reason for the rejection will be displayed in the Rejection Reason column.