Capture basic information
This is the first step to complete the non-individual enterprise application form. This part of the guide explains how to capture basic information.
The following screens should be completed before an application for a Non Individual Enterprise can be submitted:
- Basic Information
- ID Documents
- Branchs
- Business Information
- Bank Information
- Employee
- Owner
- Tax representative
- Contact person
- Review and submit
Step 1 - Choose the taxpayer type
- Click on the Start New Application button. This action opens the Taxpayer Type page;

- In the Taxpayer Type section, use the dropdown list to choose the Taxpayer Type and the Language;
- Click on the Continue button. This action opens the Basic Information section, assigns a number to the new application and updates the Home page. The Basic Information section title is highlighted;

Step 2 - Capture basic information
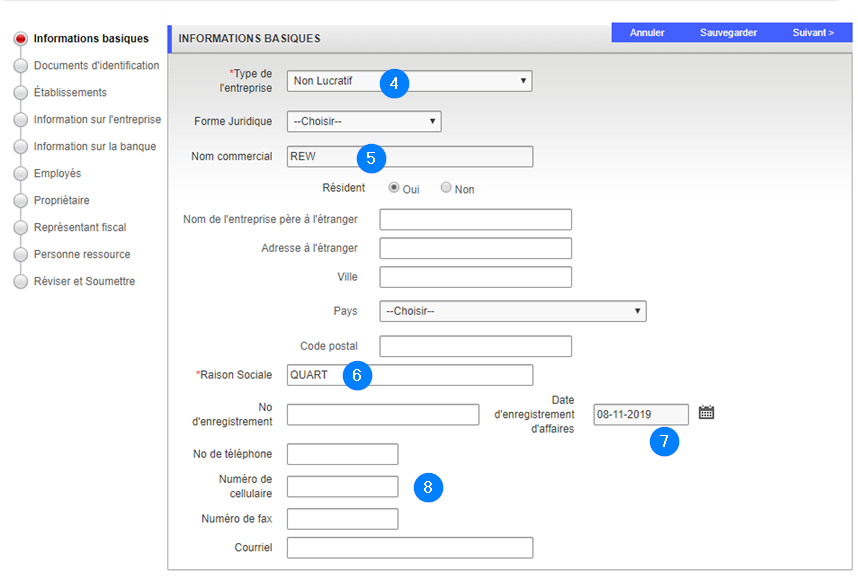
- Use the dropdown list to choose the Enterprise Type;
- Enter the Main Trade Name in the corresponding field;
- Fill out the Registered Name field;
- Choose the Business Reg Date;
- Fill out the other fields, if needed;

The completion of the basic information registration requires the taxpayer to enter both the mailing and the trading addresses. When the Mailing Address same as Trading Address box is checked, the mailing address is automatically added to the list of addresses.
Step 3 - Add an address
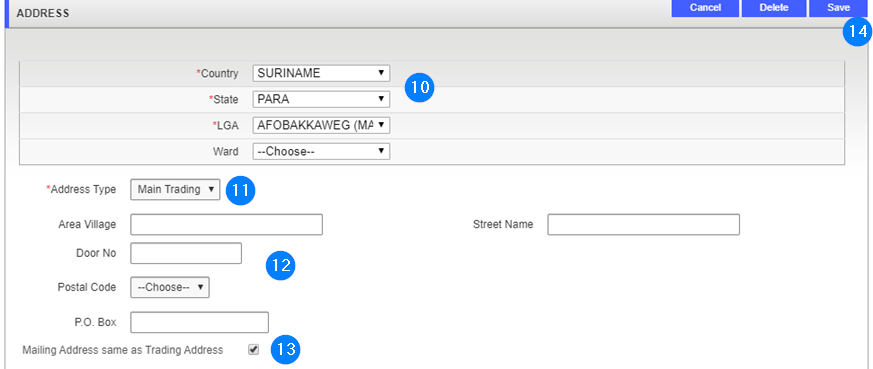
- In the Address section, click the Add button. This action opens the Address popup window;

- In the Address section, use the dropdown list to choose the Country, State and LGA;
- Use the dropdown list to choose the Address Type;
- Enter other information if required;
- Check the Mailing address same as Traiding Address box, as appropriate. If the mailing trading address is different than the mailing address, fill out the required fields;
- Click the Save button. This action confirms the addition of both the mailing and mailing trading addresses and updates the Home page (the navigation train button becomes green);

- Click on the Next button to go forward. The next step is: Add ID documents.


