Add an individual enterprise
This part of the guide explains how to add an individual enterprise and associate employees and activities.
The Business Activity, Individual Enterprise Address and ID document must be entered in order to associate the individual enterprise to the individual taxpayer.
Step 1 - Go to the Individual Enterprise popup window
- Click the Add button. This action opens the Individual Enterprise popup window;

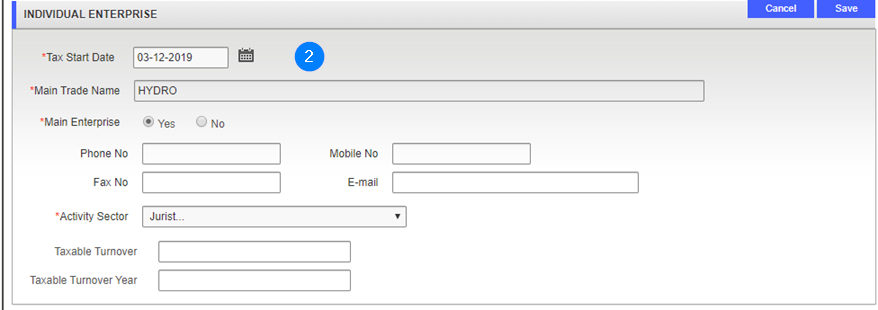
Step 2 - Add an individual entreprise
- Go to the Individual Enterprise section and fill out the required fields (identified by a red asterisk *) as well as other fields as needed;
Step 3 - Add a business activity
- Go to the Business Activity section and click the Add button. This action opens the Business Activity popup window;

- Fill out the required fields (identified by a red asterisk *) as well as other fields as needed;
- Click the Save button. This action confirms the addition of the business activity and updates the Individual Enterprise page;

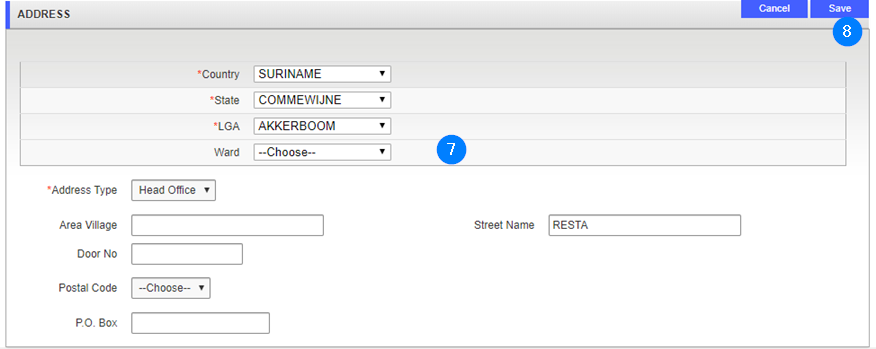
Step 4 - Add an individual enterprise address
- Go to the Individual Enterprise Address section and click the Add button;

- Fill out the required fields (identified by a red asterisk *) as well as other fields as needed;
- Click the Save button. This action confirms the addition of the indvidual enterprise address and updates the Individual Enterprise page;
Step 5 - Add an employee
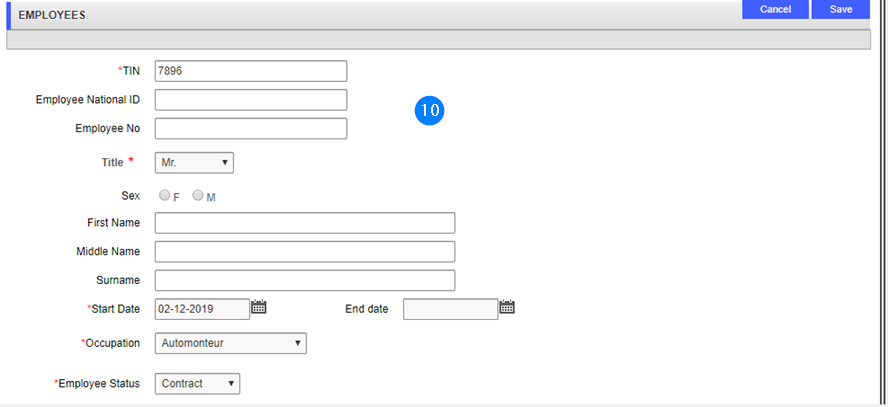
- Go to the Employees section and click the Add button. This action opens the Employees popup window;

- Fill out the required fields (identified by a red asterisk *) as well as other fields as needed;
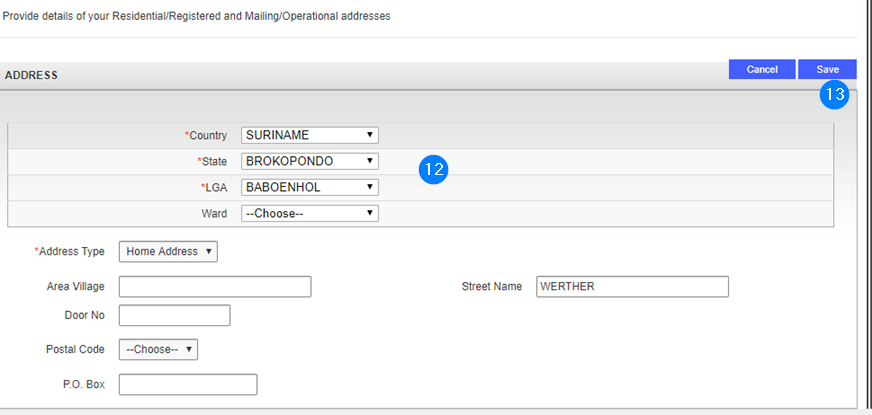
- Go to the Employee Address section and click the Add button. This action opens the Address popup window;

- Fill out the required fields (identified by a red asterisk *) as well as other fields as needed;
- Click the Save button. This action confirms the addition of the employee address and updates the Employees page;
- Click the Save button again to go back to the Individual Enterprise page;

Step 6 - Add an establishment
- Go to the Establishment section and click the Add button. This action opens the Branchs popup window;

- Fill out the required fields (identified by a red asterisk *) as well as other fields as needed;
- Go to the Establishment Activity section and click the Add button. This action opens the Establishment Activity popup window;
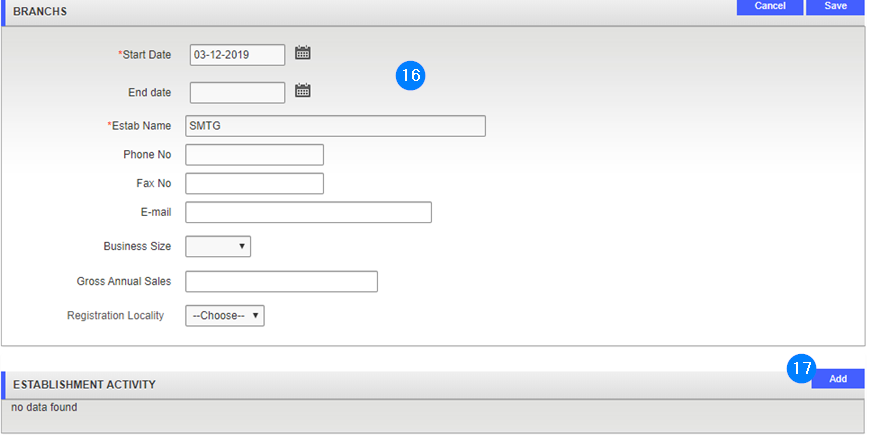
- Fill out the required fields (identified by a red asterisk *) as well as other fields as needed;
- Click the Save button. This action confirms the addition of the establishment activity;

- Go to the Establishment Address section and click the Add button;

- Fill out the required fields (identified by a red asterisk *) as well as other fields as needed;
- Click the Save button. This action confirms the addition of the employee address;
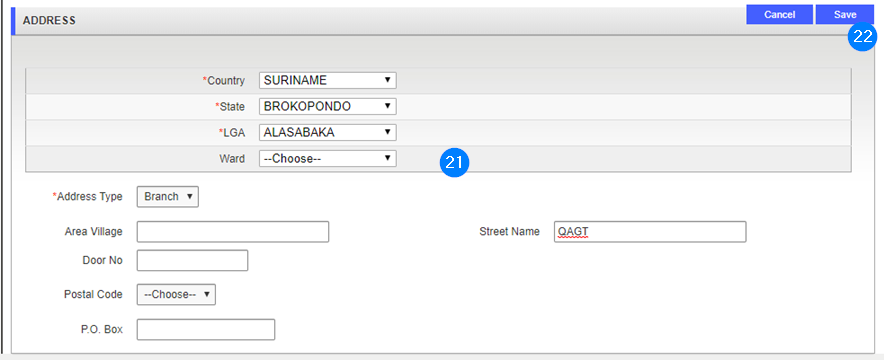
- Click the Save button to go back to the Individual Enterprise page.

Step 7 - Add an ID document
- Go to the ID documents section and click the Add button. This action opens the Individual Enterprise popup window;

- Fill out the required fields (identified by a red asterisk *) as well as other fields as needed;
- Click on Add to add a scan of the ID document and repeat the process if needed;
- Click the Save button. This action confirms the addition of the individual enterprise ID document and updates the Individual Enterprise page.;

- Click the Save button again to confirm the addition of the individual enterprise.

- Click the Next button to go forward to the next step: Bank Information


